Visible to Intel only — GUID: kly1432546120097
Ixiasoft
1.2.2.2. Setting Up the Development Kit
The following steps are to setup the Arria 10 FPGA development kit before running the reference design.
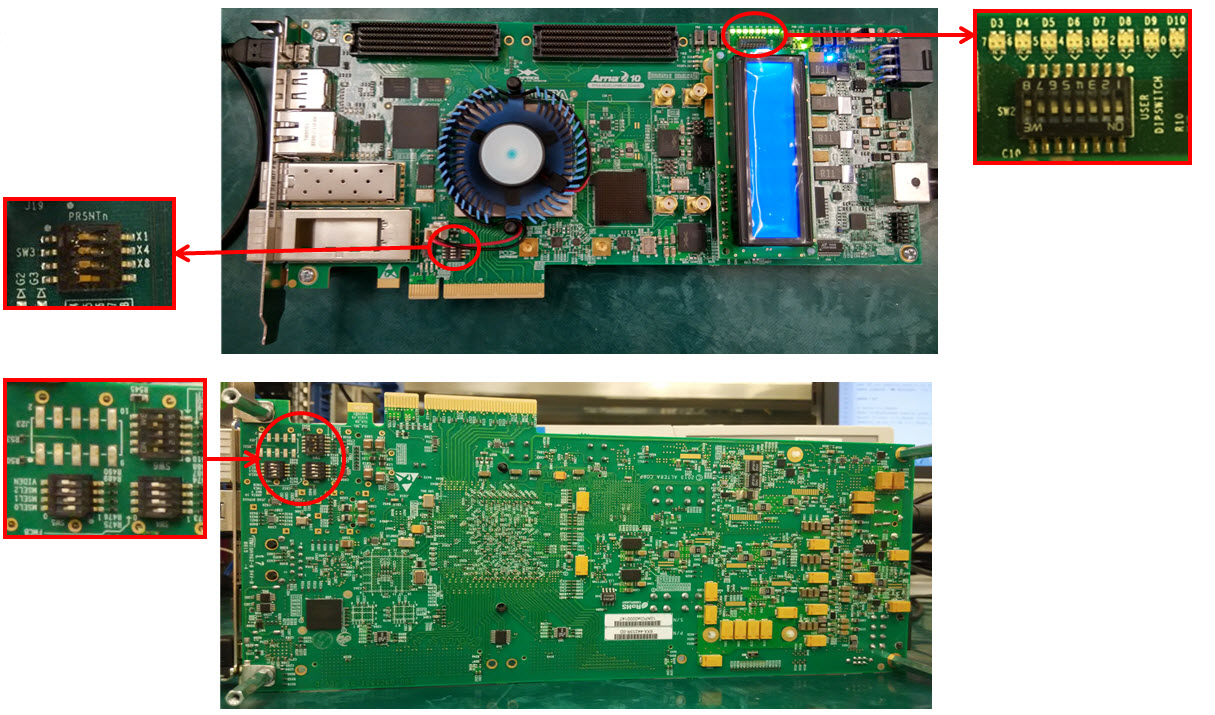
- Make sure the Arria 10 FPGA development board switches settings are shown as below.
Figure 11. Switch Settings for Arria 10 FPGA Development Kit
- Connect the Intel® FPGA Download Cable to the Arria 10 FPGA development kit and your host machine.
- Follow the guidelines in Getting Started with the Design Store to download and install the reference design files.
- Open the reference design .qpf file after successfully installing the design templates.
- In the Intel® Quartus® Prime software, open dut_INPUT.qsys and dut_OUTPUT.qsys files. Make sure the Altera PHYLite IP core has the configuration shown below:
Figure 12. Configuration for dut_INPUT Module
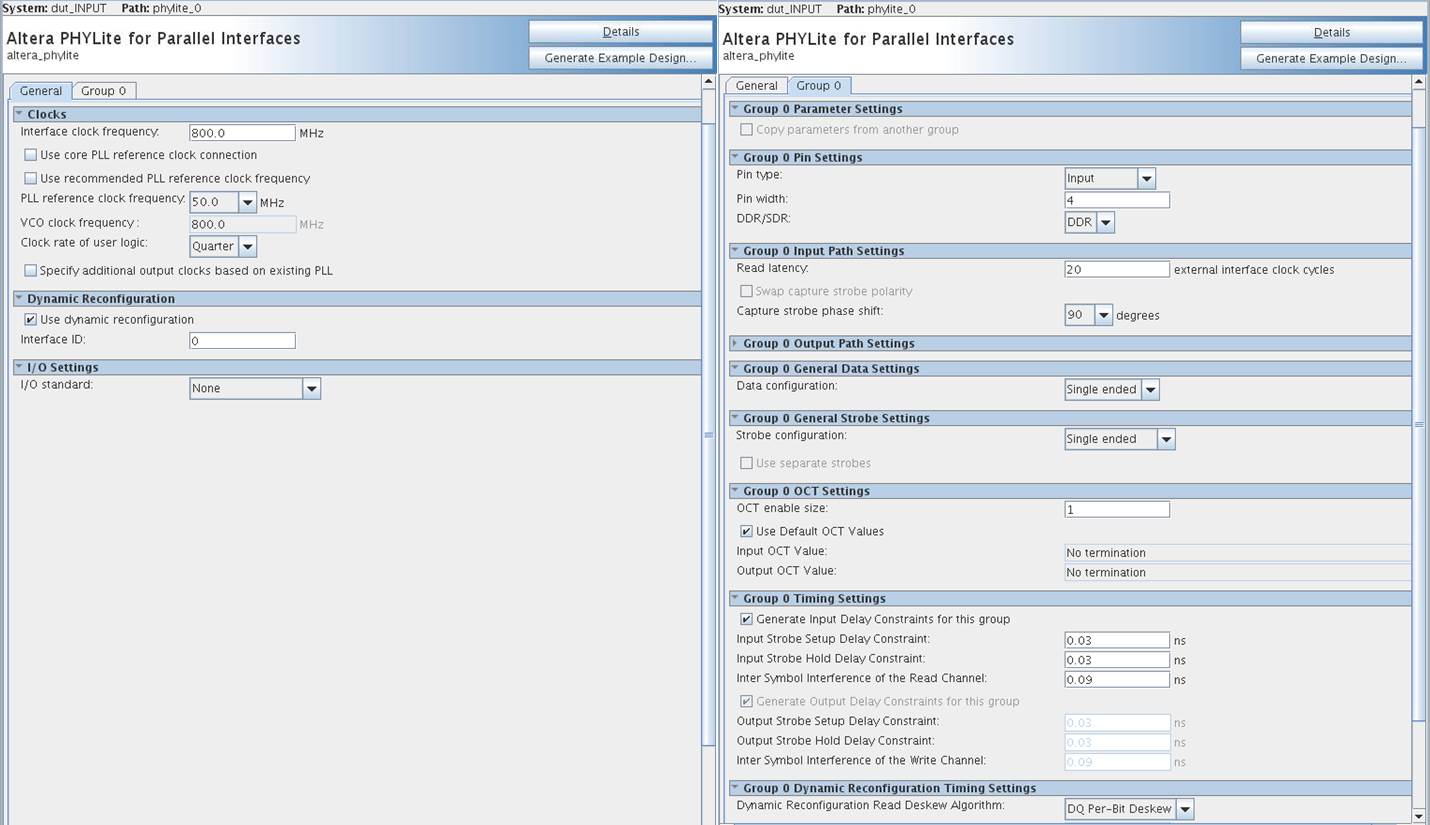 Figure 13. Configuration for dut_OUTPUT Module
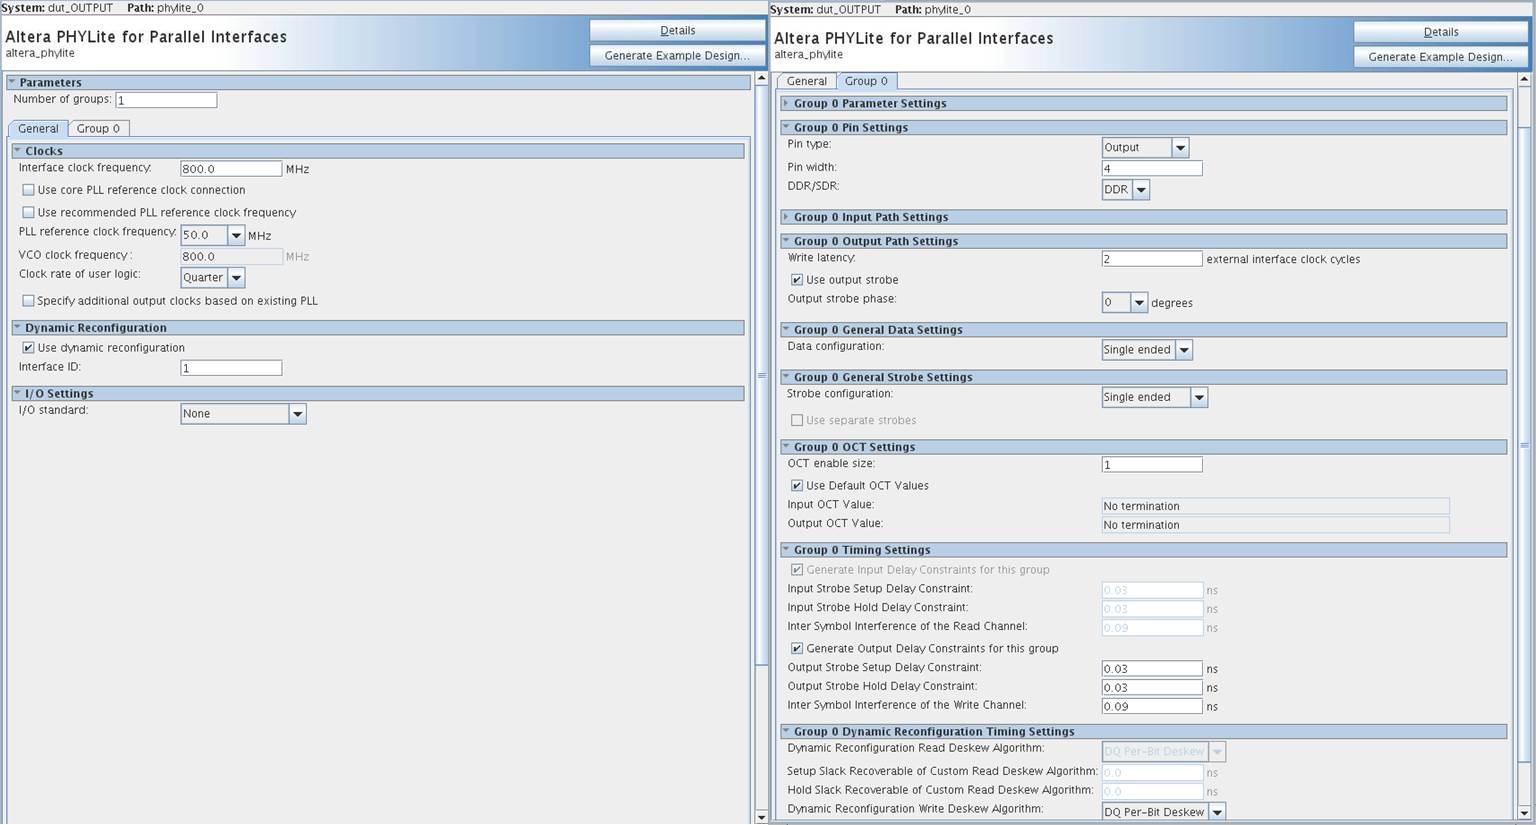
- Click Tools -> Programmer to program the <project directory> /master_image/top.sof and <project directory>/master_image/max5.pof files into the Arria 10 FPGA development board.
- In the <project directory>/core/ folder directory, copy the clk_gui.zip folder to your local machine.
- In your local machine Quartus II software installation version 13.1 folder, go to <installation directory>\win64\nios2eds\Nios II Command Shell.bat and execute NIOS II Command Shell.bat.
- In the command shell, specify the clk_gui folder path with the command: cd <directory to the copied clk_gui folder>.
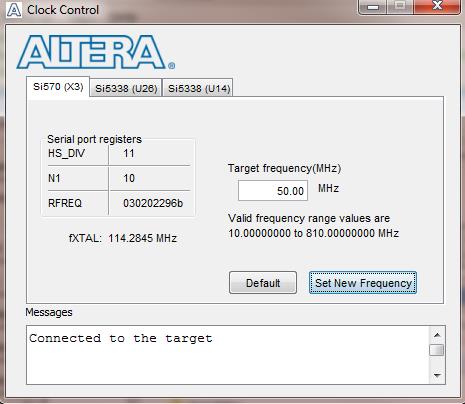
- Use the command java -jar clk_cont.jar to launch the clock control GUI.
- In the clock control GUI, set the target frequency as 50MHz for Si570 (X3) window. Click Set New Frequency.
Figure 14. Clock Control Setup
Related Information