By Christian Mills, with Introduction by Peter Cross
Introduction
As part of this ongoing series focused on exploring AI inferencing technology and its usage in game development (and other creative outlets), we feel privileged that Graphics Innovator, Christian Mills, has once again extended his series of Unity tutorials focused on leveraging the Intel® Distribution of OpenVINO™ toolkit in game development engines. Previous tutorials were heavily focused on style transfer technology, but with this one, he pivots to showing how similar development methodologies can be used to implement AI object detection technology in games. It is our hope that the developer community can use these foundational tutorials to expand their knowledge of AI and machine learning, and build even more amazing experiences. I feel we've only scratched the surface for what this technology can do to improve gaming and virtual experiences, and I can't wait to see what this new revolution in intelligent gaming inference brings to the world.
Overview
In this tutorial series, we will explain how to perform object detection in the Unity* game engine with the OpenVINO™ Toolkit. As demonstrated above, object detection model allow us to locate and classify objects inside an image or video. Combining this functionality with Unity* unlocks significant potential for interactive applications.
These models can be trained to detect arbitrary types of objects provided, there is sufficient training data. They can also be trained to detect specific people, expressions, gestures, or poses. Models used in this tutorial have been trained on the COCO (Common Objects in Context) dataset, which contains 80 different object categories.
We will use the YOLOX model developed by Megvii. YOLOX is build on the YOLO (You Only Look Once) family of real-time object detection models and implement multiple recent advancements from object detection research. The YOLOX model provide one of the best tradeoffs between accuracy and inference speed at the time of writing.
Check out the video below to see how model performs in different settings using Intel® Iris® Xe MAX Graphics.
To access the OpenVINO™ Toolkit inside Unity*, we need to create a Dynamic link library (DLL) in Visual Studio. This will contain the code to perform inference with an object detection model. We can then call functions from this DLL inside a Unity* application by importing it as a native plugin.
In the first part, we will ensure that prerequisite software is installed in our system and download pretrained object detection models in the OpenVINO™ Intermediate Representation format, along with some test videos.
Prerequisites
The following prerequisites are required to complete this tutorial.
Experience
This tutorial does not assume any prior experience with the OpenVINO™ Toolkit or Unity*. However, some basic experience with Unity* would be beneficial.
System Requirements
The target platform for this project is Windows 10 64-bit. The OpenVINO™ Toolkit does not appear to support 32-bit versions. Given that, the OpenVINO™ Toolkit is designed for Intel hardware, an Intel CPU and/or GPU is highly recommended.
Unity*
The first prerequisite we will want to set up is Unity*. The Unity* Editor can be installed through the Unity* Hub, which can be downloaded from the link below.
- Unity* Hub: (download)
We will use Unity* 2020 LTS. The exact version can be downloaded from the links below. - Unity* LTS Releases: (download)
- Download Unity* 2020.3.18 (LTS): (download)
Note The installation process will also install Visual Studio, one of the other prerequisites.
The tutorial below walks through the basics of Unity*, from the installation process all the way to making an Angry Birds clone.
Visual Studio
Unity* automatically includes Visual Studio when installing the Editor. However, it can also be downloaded directly from the link below.
- Visual Studio Community 2019: (download)
Visual C++ Redistributables
The Visual C++ Redistributables should be installed along with Visual Studio. If not, they can be downloaded from the link below.
- Latest C++ Redistributables: (link)
CMake
The official OpenVINO™ installation guide lists CMake as a requirement. However, we do not need it for this project. Still, the latest release of CMake 64-bit link is given below.
- CMake: link
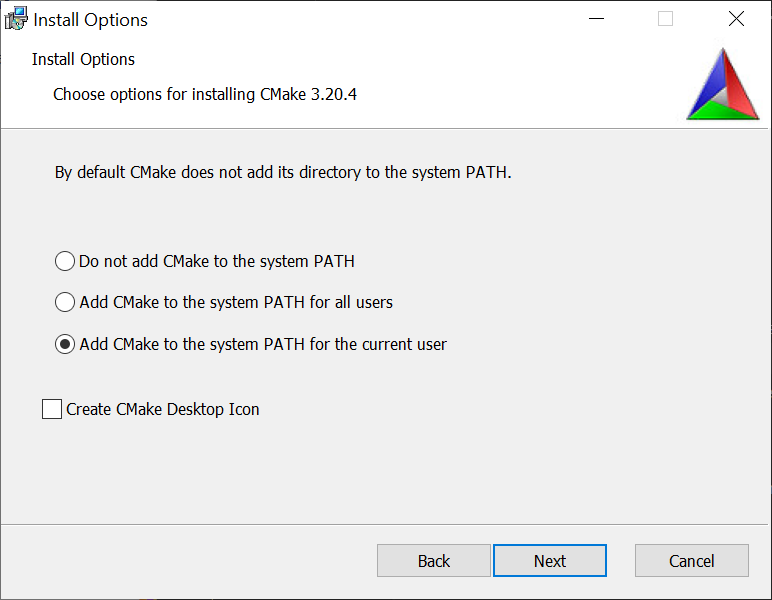
Note Make sure to select one of the Add CMake to the system PATH options during the installation process.
Python*
Python* 3.6, 3.7, or 3.8 64-bit are required to convert a model from ONNX format to OpenVINO™'s Intermediate Representation (IR). We can install Python* 3.8 from the Windows Store. This method automatically configures the Python* installation to be accessible from the command line.
- Windows Store Python* 3.8: (link)
The YOLOX models are already available in OpenVINO™ IR format, so Python* is not required for this tutorial. However, models trained on custom datasets will have to be converted. The steps for converting models from ONNX format to OpenVINO™ IR are explained in a previous tutorial. The YOLOX models are also available in ONNX format on GitHub.
OpenVINO™
We now have all the required prerequisites to install OpenVINO™. We will use OpenVINO™ 2021.3 for this tutorial. First time users will have to fill out a registration form to download the toolkit.
Download OpenVINO™ IR Models
Megvii has already converted several variants of the YOLOX model to OpenVINO™ IR format and made them available on GitHub. Each variant provides a different tradeoff between accuracy and inference speed.
Download the folder containing the models from the link below. We will use this folder in the final Unity* application.
Each variant of the model has three files associated with it:
- yolox_10.bin
- yolox_10.mapping
- yolox_10.xml
We would require the .bin and .xml files. The .xml files describe the network topology, including the layer operations and flow of data through the network. Here is a snippet from the top of an .xml file.
<?xml version="1.0" ?>
<net name="yolox_10" version="10">
<layers>
<layer id="0" name="inputs" type="Parameter" version="opset1">
<data element_type="f16" shape="1, 3, 640, 640"/>
<output>
<port id="0" names="inputs" precision="FP16">
<dim>1</dim>
<dim>3</dim>
<dim>640</dim>
<dim>640</dim>
</port>
</output>
</layer>
<layer id="1" name="Slice_4/Concat592120366" type="Const" version="opset1">
<data element_type="i64" offset="0" shape="4" size="32"/>
<output>
<port id="0" precision="I64">
<dim>4</dim>
</port>
</output>
</layer>
The .bin files store the constant values for the models learned during the training process.
Download Test Videos
We will use several videos to test the model's performance on different object classes. These videos are available on Pexels, a free stock photos & videos site. Download the video in 1080p or Full HD when available. We will not test all 80 object classes, but these should provide a general idea of how the models perform in different settings. Feel free to try other videos as well.
Conclusion
That takes care of the required setup. In the next part, we will cover how to create a Dynamic link library (DLL) in Visual Studio to perform inference with an OpenVINO™ IR model.
Corresponding Tutorial Links
Related Links
In-Game Style Transfer Tutorial in Unity
Targeted GameObject Style Transfer Tutorial in Unity
Developing OpenVINO Style Transfer Inferencing Plugin Tutorial for Unity